Setting Up a Raspberry Pi for Core Network Services

In this post, I’ll walk through the foundational setup of a Raspberry Pi that will serve as a core component in my home network infrastructure. This Pi will act as a central hub for essential network services, hosting everything from ad-blocking DNS to network management tools. To achieve this, I’ll configure a static IP address, set up a domain name for easy access, and install Docker in rootless mode for secure container management. This setup provides the groundwork for running a suite of crucial applications, with Docker enabling flexible deployment and management of each service.
This is the first post in a series that will explore building a robust home network ecosystem. In future posts, I’ll cover how I install and configure specific services on this Pi, like Traefik for reverse proxying, the UniFi Controller for network management, and Pi-hole for DNS-based ad-blocking. By the end of this series, you’ll have a step-by-step guide to setting up a Raspberry Pi as a powerful, multi-functional network appliance.
Getting Started
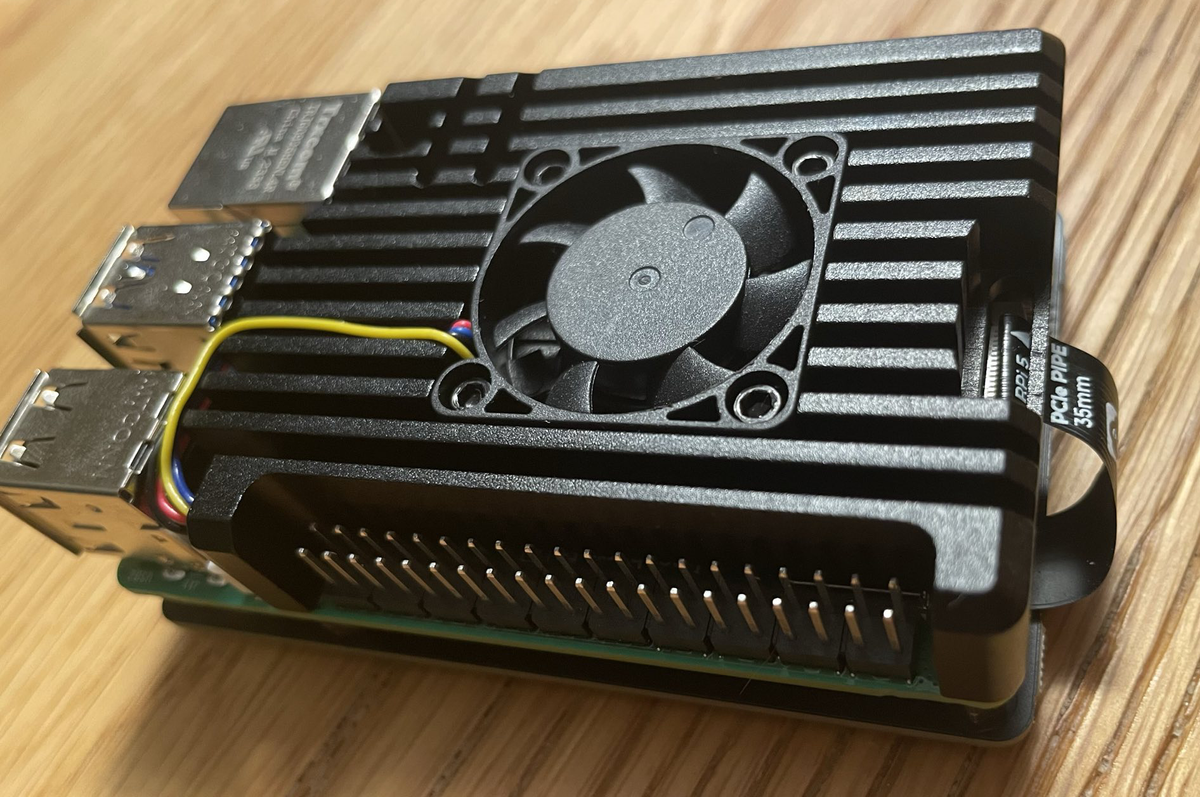
For this project, I'm using a Raspberry Pi 5 with 8GB of RAM, housed in a sleek aluminum heatsink case with a cooling fan for added thermal management. This setup is also paired with an NVMe SSD for faster storage and improved reliability compared to a microSD card. While none of these upgrades are strictly necessary to run a core network server, they add a layer of performance and durability—and, let’s be honest, they make the setup look great.
The heatsink and fan help keep the Pi’s temperatures in check, which is especially useful when running multiple Docker containers or intensive applications. And with the SSD as my primary storage, I get faster read and write speeds, which benefits the overall responsiveness of services hosted on the Pi.
In future posts, I might dive into a more detailed guide on assembling and configuring the hardware itself. But for now, the focus is on building the software foundation that will power my network services.
When configuring a Raspberry Pi to host essential network services, setting a reliable and predictable network configuration is crucial.
Define a Static IP Address
To keep my network organized, I prefer assigning static IPs through my DHCP server rather than configuring them directly on each device. This approach makes it easier to manage multiple devices in one place. For this, I need to know the MAC address of my Raspberry Pi.
To identify the Raspberry Pi’s initial IP address, I use an NMAP scan across my local network. This scan lists all devices on the network, allowing me to spot the Raspberry Pi and retrieve its MAC address.
nmap -sn 192.168.1.0/24With the MAC address in hand, I can define a static lease in my DHCP server. In my case, I’m using OPNSense as my router and firewall. To set a static IP:
- Go to Services > DHCPv4 > [LAN] in OPNSense.
- Add the lease at the bottom of the page, assigning an IP to the Raspberry Pi’s MAC address.
For this setup, I’ve assigned 192.168.1.3 to my Raspberry Pi. My OPNSense firewall uses 192.168.1.1, and my TrueNAS server is on 192.168.1.2, so this setup keeps everything sequential and easy to remember.
Alternative: Setting the IP Directly on the Raspberry Pi
If you'd rather set the IP address directly on the Raspberry Pi, you can use the Network Manager Text User Interface (nmtui), which provides a straightforward way to configure network settings:
sudo nmtui
This tool allows you to set the IP address, gateway, and DNS servers directly on the device. Ensure to chose "manual" as it won't have any effect else.
Set the Hostname
Since I use a real domain name for my network, I can obtain SSL certificates from Let's Encrypt for secure, domain-based access. Setting a custom hostname makes it easier to manage and recognize the Raspberry Pi on the network.
You can set the hostname in nmtui, or manually edit the /etc/hosts file to map the hostname to your static IP.
sudo nano /etc/hosts
Add an entry like the following:
192.168.1.3 core.vos.direct core
This ensures that core.vos.direct resolves to the Raspberry Pi’s IP address within the network.
Install Docker
With the IP address and hostname configured, the next step is to install Docker. Docker is essential for running containers that will host various services.
To install Docker, use the following command:
curl -sSL https://get.docker.com/ | CHANNEL=stable sh
sudo apt install -y uidmap
For added security, I use Docker in rootless mode. This approach allows me to run Docker containers without granting full root access, isolating container permissions per user. To set up rootless Docker:
Run the setup tool for each user who will use Docker:
dockerd-rootless-setuptool.sh installI prefer running all Docker containers under the admin user. This simplifies management because each user runs their own Docker daemon, so it’s easy to track and manage containers per user. Note that Docker containers are isolated by user, meaning you won’t see containers from other users.
Enable Low-Port Binding for Docker in Rootless Mode
If you plan to bind services to ports below 1024 (such as HTTP on port 80), you’ll need to grant the rootlesskit binary the necessary permissions:
sudo setcap cap_net_bind_service=+ep $(which rootlesskit)
This capability allows the rootless Docker daemon to bind to privileged ports.
Prevent User Services from Stopping on Logout
I ran into an issue where my Raspberry Pi would stop user services (like Docker) after a period of inactivity or when the SSH session ended. This happened because systemd was terminating services for logged-out users. To fix this, I enabled "lingering" for the admin user, allowing services to continue running even when the user is not logged in:
sudo loginctl enable-linger admin
To make sure the Docker service for the admin user starts automatically, enable it with the following command:
systemctl --user enable docker
After making these changes, I recommend rebooting the Raspberry Pi to ensure everything is applied:
sudo reboot
If the Raspberry Pi becomes unreachable after the reboot, a power cycle (unplugging and plugging it back in) can often resolve this.
Setting Up Additional Network Services
With the basic setup complete, I moved on to setting up essential services that will run on the Raspberry Pi.
Traefik: Reverse Proxy and SSL Certificates
First, I configured Traefik as a reverse proxy. Traefik allows me to route traffic to various services by subdomain and also handles SSL certificates via Let's Encrypt. This setup makes it easy to access services securely and with user-friendly URLs.
UniFi Controller: Managing Network Gear
Since I use Ubiquiti networking gear, I installed the UniFi Controller on the Raspberry Pi. This tool lets me manage my network devices, configure Wi-Fi, monitor traffic, and more, all from a central dashboard.
Pi-hole with DNS-over-HTTPS (DoH): Ad-Blocking and Secure DNS
Finally, I set up Pi-hole as an ad-blocking DNS server. Pi-hole filters ads and trackers at the DNS level, providing network-wide ad blocking. Additionally, I configured DNS-over-HTTPS (DoH) with Cloudflare, ensuring that DNS queries are encrypted for privacy.
Support
All content on this blog is free and open to everyone—no paywalls, no exclusive sections. I believe knowledge should be shared, and I’m here to make tech accessible and enjoyable. If you found this post helpful or inspiring and want to help keep things running, consider supporting with a one-time donation. Every bit helps me keep creating and sharing!


